
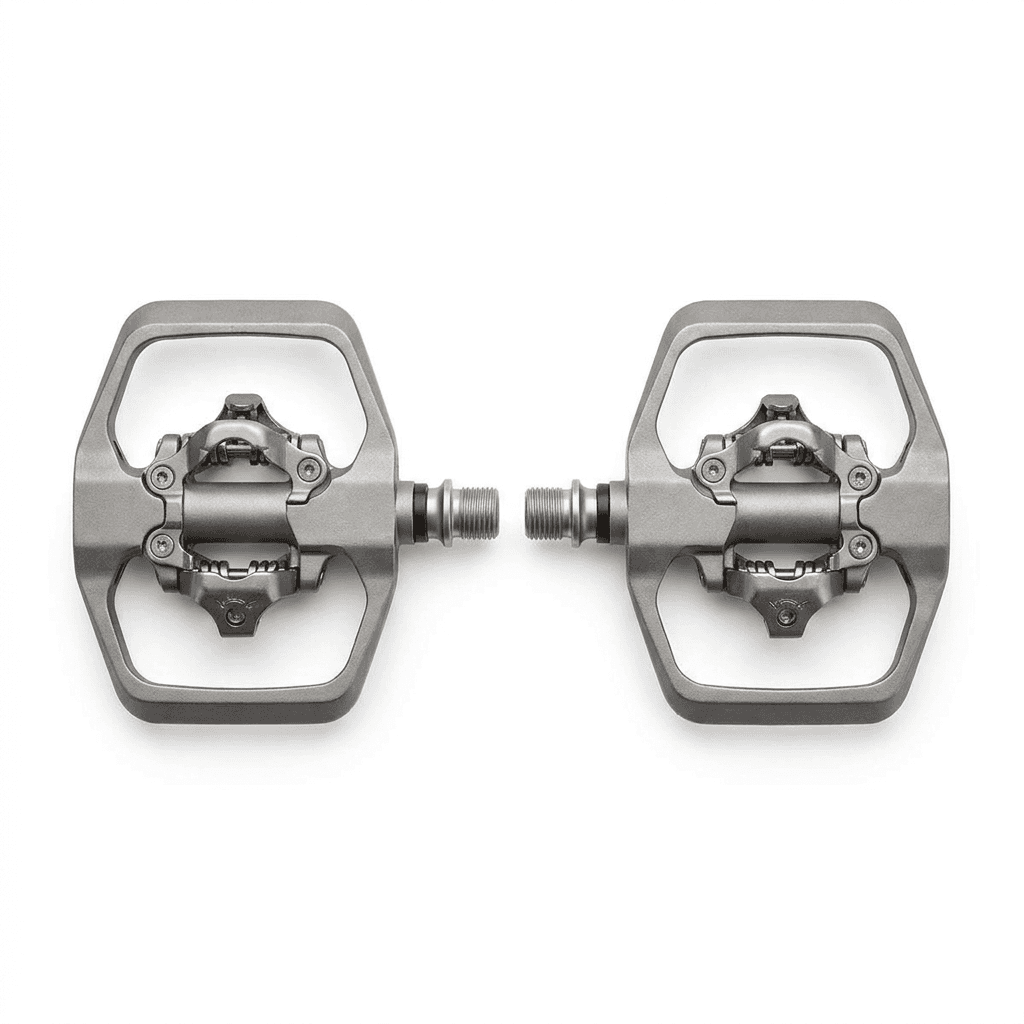
ROAMVUE MTB Pedals
Built for mud. Cleats in, mud out.
Most clipless MTB pedals clog up the moment the trail turns brown.
- Warranty stated on the listing when it opens
- Amazon listing opening soon
- Join the list and we will email you when it goes live
The Amazon listing is not open yet. Join the list and we will email you the day it goes live.
Read the install stepsROAMVUE participates in the Amazon Services LLC Associates Program. We earn from qualifying purchases. Returns handled via Amazon.
The problem
Why we built this.
Most clipless MTB pedals clog up the moment the trail turns brown. We designed the mud channel wider, the bearing sealed deeper, and the platform thicker than the usual suspects. The result: you clip in, you ride, you don't think about your pedals. Which is exactly how it should be.
What you actually get
Core value, in plain language.
Mud clears in one clip
Wider mud channel. 14 mm platform-to-cleat gap. You feel it the first time the trail turns brown.
Sealed cartridge bearings
Bearings sealed deeper than the usual suspects. No service interval for 2 seasons.
Familiar SPD feel
Standard Shimano SPD 2-bolt cleat. Adjustable release tension, 4 to 8 Nm.
Forged aluminum, anodized
Takes hits, doesn’t show them. Built for the long trail, not the Instagram shot.
Compatibility
Will it work with mine?
A structured look at every device and axle standard we list, including the ones that fall outside coverage. Check the Amazon listing before you buy - it is the authoritative version.
| Device or setup | Status | Note |
|---|---|---|
| Shimano SPD cleats (SM-SH51, SM-SH56) | Fully compatible | — |
| Look X-Track cleats | Fully compatible | — |
| Crankbrothers standard 2-bolt | Fully compatible | — |
| Time ATAC cleats | Fully compatible | — |
| MTB shoes with 2-bolt cleat pattern | Fully compatible | — |
| Road 3-bolt cleats (SPD-SL / Look Keo) | Not compatible | Different cleat pattern. We do not make a road pedal. |
| Flat / platform pedal users | Not compatible | Clipless platform only. See our flat pedal line, 2027. |
Can't find your device?
Email our support team with your bike make, model, and axle standard. We aim to email you back within a few working days.
Specifications
The full specifications.
Specifications, dimensions, weight, performance - and a one-line plain-language note next to the numbers that benefit from context.
Material
| Body | Forged 6061-T6 aluminum, anodized |
| Spindle | Chromoly steel |
| Bearings | Sealed cartridge (per pedal) |
| Cleat hardware | Stainless steel |
Dimensions
| Platform | 95 mm x 70 mm |
| Q-factor | 55 mm |
| Stack height | 17.5 mm |
Weight
| Per pair (with cleats) | 430 g about the weight of a small paperback |
| Per pedal (no cleat) | 190 g |
Performance
| Release tension | Adjustable 4 - 8 Nm |
| Mud clearance | 14 mm platform-to-cleat gap |
| Max rider weight | 110 kg / 242 lb |
| Sealing | IP54 (mud, rain, dust) |
In the box
| 2x | Pedals (pair) |
| 2x | SPD cleats |
| 6x | Cleat mounting bolts |
| 1x | Instruction card |
In use
Where it actually earns its keep.
Wet Pacific Northwest roots
Mud doesn’t win. You clip in on the first try, every try.
Alpine late-season riding
Sealed bearings shrug off cold rain and standing water crossings.
Long-distance trail events
No bearing service required for 2 seasons - one less thing between you and the start line.
Everyday bike-to-work
Walk confidently on the platform, clip in at the first light.
Install & care
Set it up. Keep it alive.
Five short steps to get you riding, plus three care tips that will keep the product in good shape for the long haul.
- 01
Mount the cleat on your shoe
Step 1 of 5Front-center of the cleat aligns with the ball of your foot.
- 02
Set cleat tension
Step 2 of 5Tighten bolts to 4 - 5 Nm - release tension will be adjusted later.
- 03
Grease the spindle threads
Step 3 of 5Light grease only. Do not get grease on the bearing seal.
- 04
Install pedal to crank
Step 4 of 5Right pedal = clockwise. Left pedal = counter-clockwise. 35 Nm.
- 05
Set release tension
Step 5 of 5Click into both pedals 10 times each. Adjust until un-clip is natural, not jarring.
- Spray water through the mud channel after every wet ride.
- Re-grease the spindle every 12 months if you ride weekly.
- Replace the cleat when the front hook shows a flat spot - that’s a sign of worn engagement.
Reviews
No reviews yet.
This listing is new enough that nobody has reviewed it yet. When the first review lands, it will show up here — and it will be a real one.
This product is not on Amazon yet. Join the list and we will email you the day the listing goes live — reviews will appear here from then on.
FAQ
Answers to the questions we hear most.
The four questions riders ask before buying, in one place.
Fit & compatibility
Are the ROAMVUE pedals compatible with Shimano SPD cleats?
Will they fit my road shoes with 3-bolt cleats?
Using it
How do I adjust release tension?
Care & longevity
How often do I need to service them?
I dropped the bike on the pedal - is it still safe?
After-sale support
What if the spindle develops play inside the warranty?
Pairs well
Pairs well with the bike pedals setup.
KICKR Thru Axle Adapter Kit
The 7-piece thru-axle adapter kit for Wahoo KICKR trainers.
TICKR FIT Replacement Straps 4-Pack
Four identical TICKR FIT straps, one size, so nothing sits unused.
Front Light
Stays bright for the full claimed runtime.